")
Official guide for replacing the touch screen, display, and motherboard in the OBDSTAR DC706 ECU Tool. Follow these detailed instructions for a safe and successful repair. This guide includes required tools and key precautions.
Tools Needed: Electric screwdriver (or standard screwdriver)
Step-by-Step Instructions:
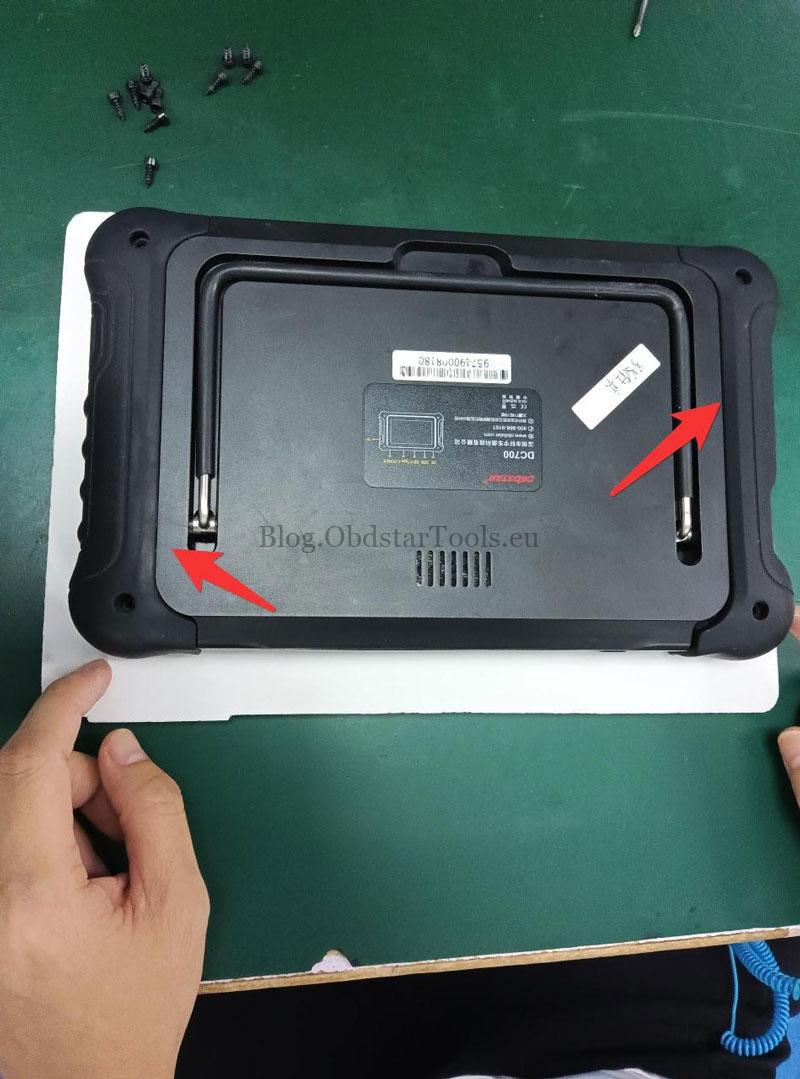
- Remove the 4 screws from the rubber sleeves.
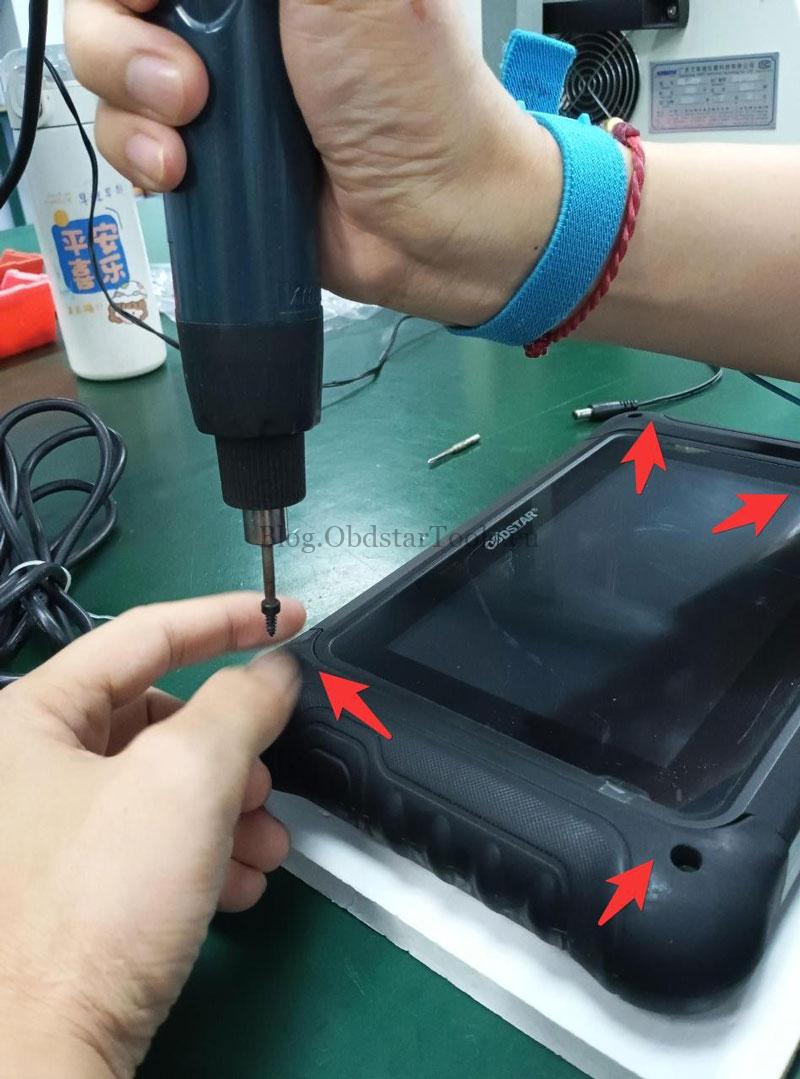
- Take off the left and right rubber sleeves.
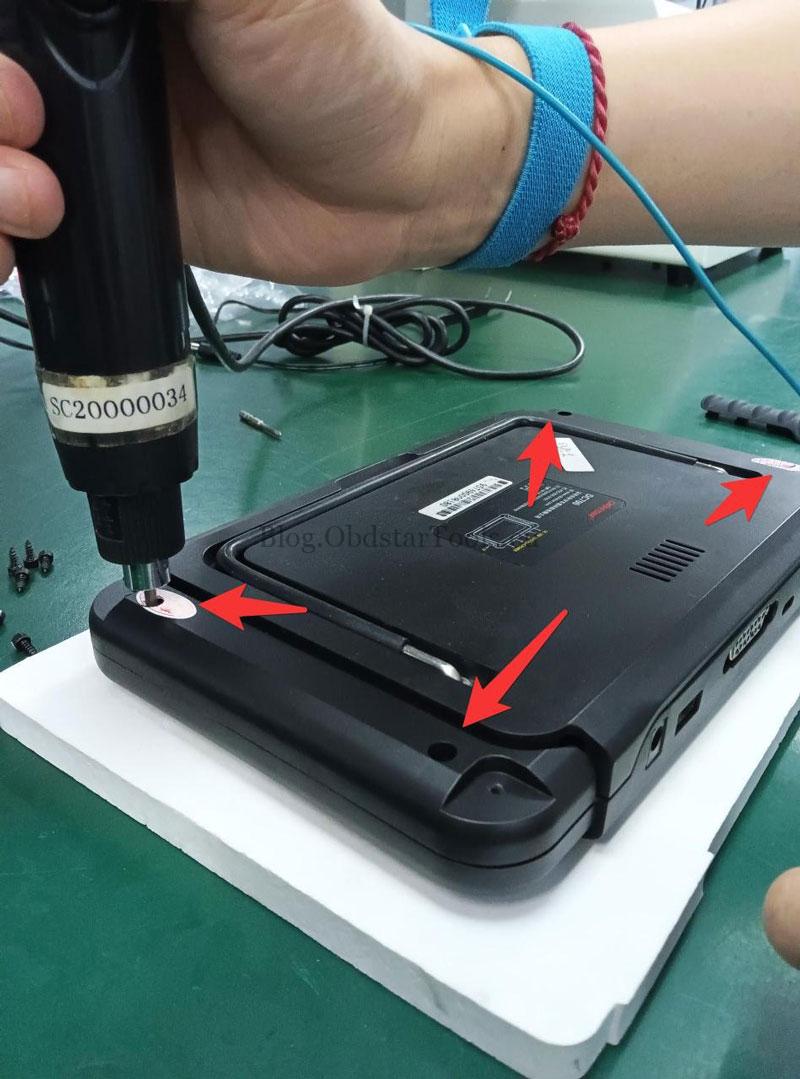
- Remove the 4 screws from the device shell.
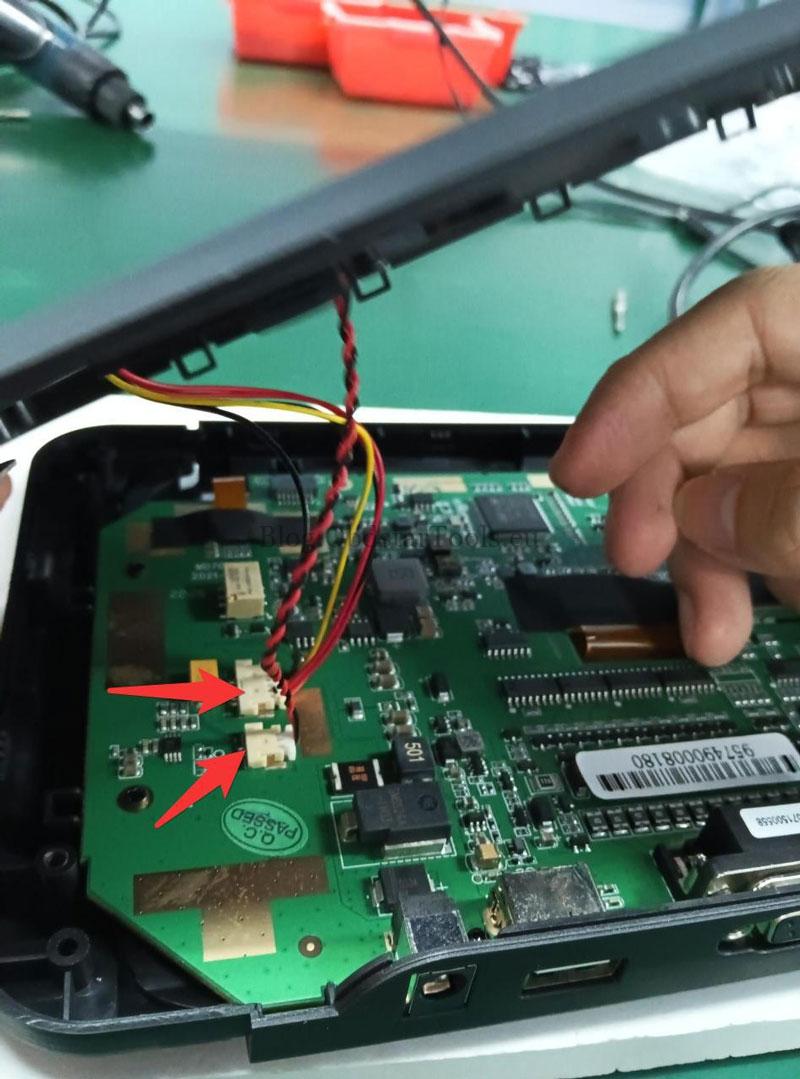
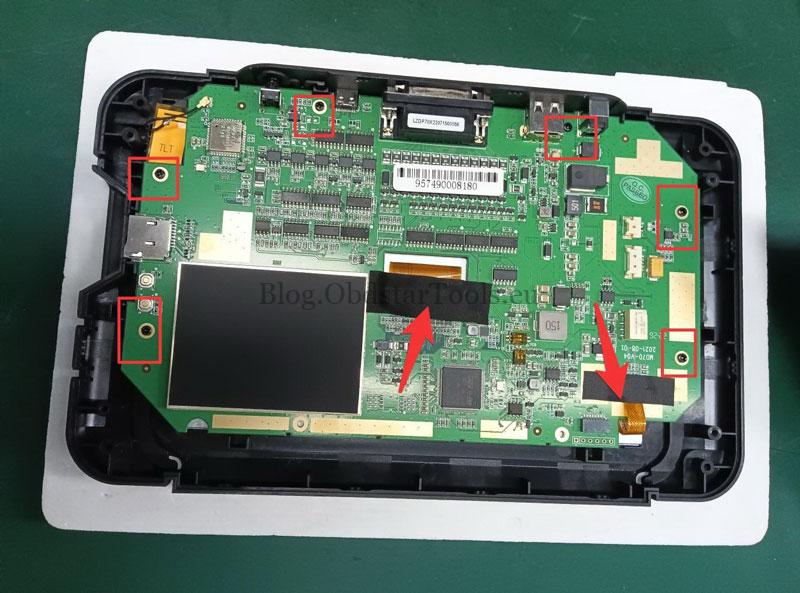
- Unplug the two wiring ports as shown.
- Remove the screws securing the motherboard. Peel off the acetate tape holding the cables.
- Disconnect the display cable and remove the WIFI antenna.
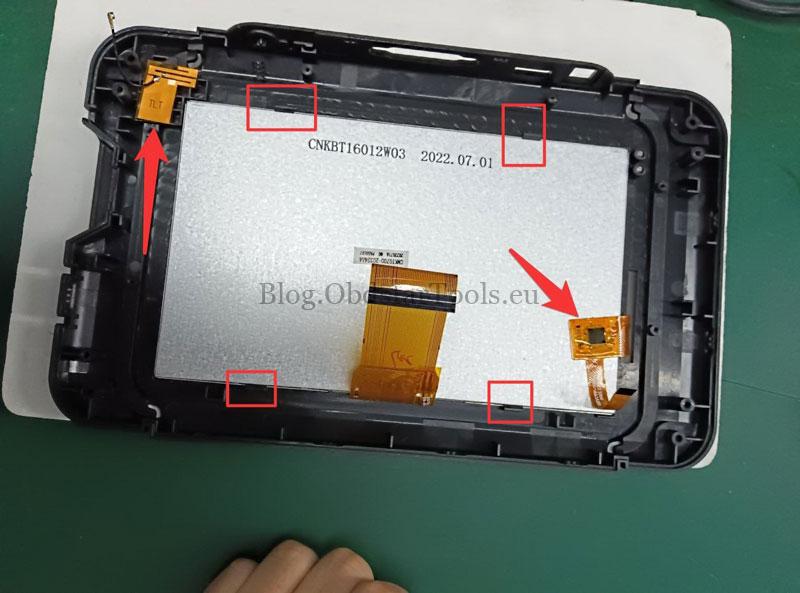
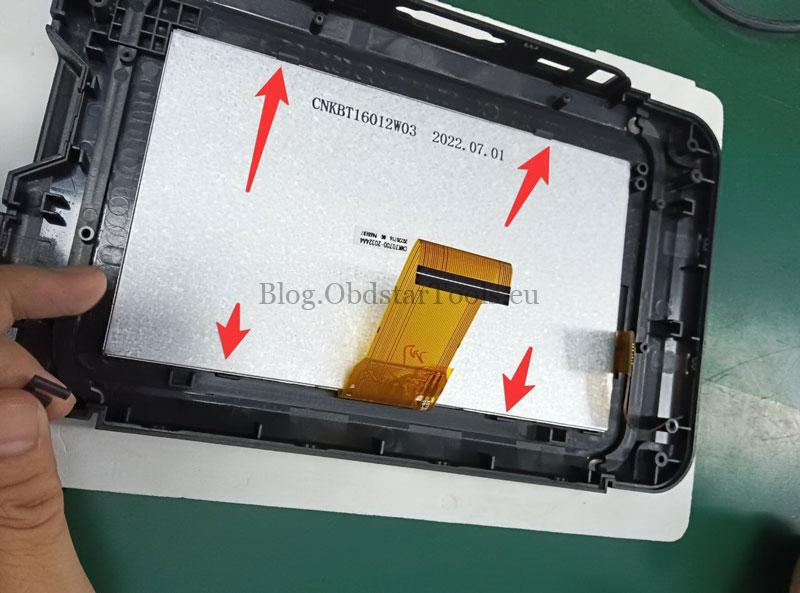
- Install the new touch screen and display assembly.
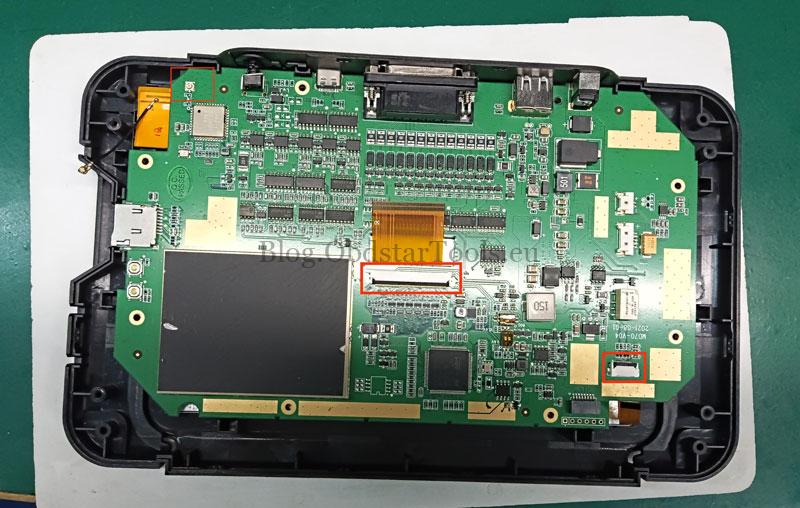
- Place the new motherboard into the shell. Connect cables and WIFI antenna. Secure with acetate tape and screws.

- Connect the power and speaker wires to the motherboard. Attach the back shell.

- Tighten the screw at the marked position.

- Reattach the rubber sleeves and install their screws.


Important Notes:
- If the device doesn’t boot after replacing the Android motherboard, contact support with your device serial number.
- If the display shows issues after replacement, contact support with your device serial number.
- When replacing the VCI motherboard, sync account info with your dealer. Provide both old and new VCI serial numbers.
END
This guide helps you safely replace the screen and motherboard in your OBDSTAR DC706. Follow each step carefully. For further assistance, always refer to customer support with your device details.
Technical Support
Email: sales@obdstartools.eu
WhatsApp/Mobile/Wechat: +86 15972933706
Skype: OBDStarTools.eu